How to Upgrade Your Brakes for Off-Road Confidence and Safety
This post contains affiliate links. As an Amazon Associate, I earn from qualifying purchases at no extra cost to you.
Stock brakes on most trucks and SUVs are calibrated for daily driving: grocery runs, highway commutes, and the occasional panic stop on dry pavement. They handle those tasks without complaint. Take that same vehicle onto a steep mountain descent with a rooftop tent, a full overlanding kit, and 200 pounds of gear, and the factory brake system is suddenly working far outside its design parameters. Heat builds faster, fade arrives sooner, and your stopping distances grow at exactly the moment when they need to shrink.
This is not a worst-case scenario. It is a normal Tuesday for anyone running a loaded overland rig. Brake fade on a sustained downhill is one of the more dangerous situations you can encounter on trail, and it happens with less warning than most drivers expect. The good news is that upgrading your brakes is one of the most cost-effective safety improvements available to an overlander - often cheaper than a set of all-terrain tires and considerably more consequential.
This guide covers when an upgrade is warranted, what your options actually are, how to match hardware to your specific build, and how to install and bed the system correctly. Whether you’re starting with better pads or stepping up to a full big brake kit, the process is approachable if you work through it methodically.
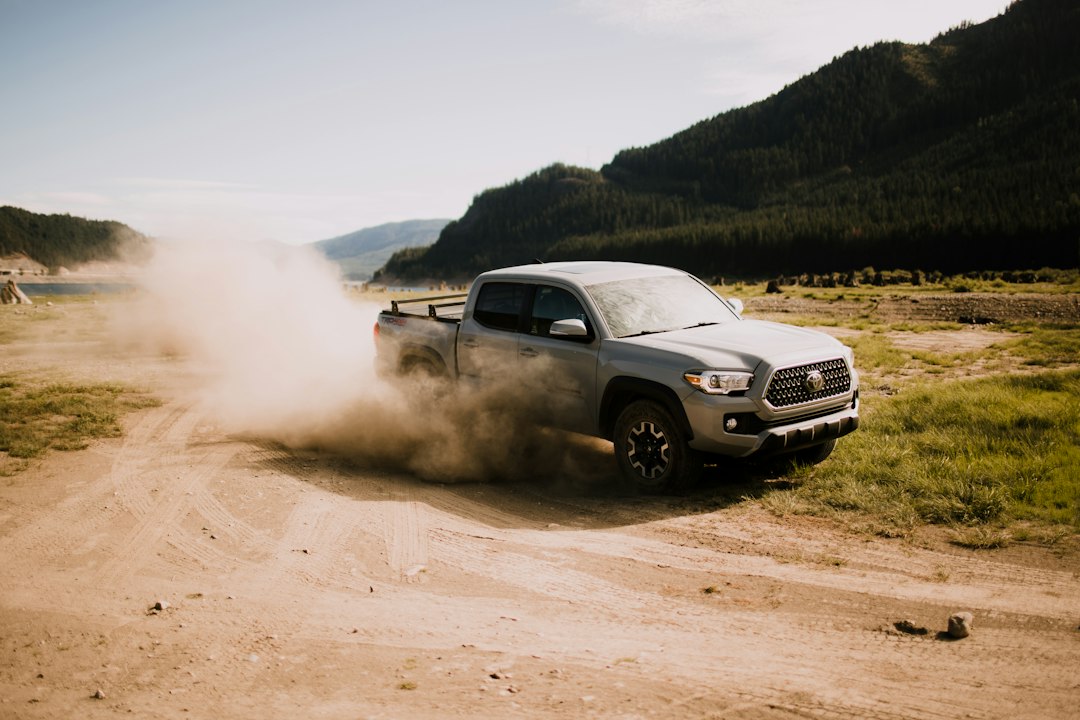
Photo by Blake Carpenter on Unsplash
Why Stock Brakes Struggle on Off-Road Terrain
Factory brake systems are calibrated to handle the vehicle at its rated gross vehicle weight under normal road conditions. The moment you start modifying, that calibration begins to drift. Bigger tires add rotational mass, which increases the kinetic energy your brakes must absorb on every stop. A lift kit changes suspension geometry in ways that can affect how brake bias distributes between the front and rear axles. A rooftop tent, cargo drawer system, and full overlanding kit can add 400 to 700 pounds to a rig that was already running close to capacity.
The core problem is thermal. Braking converts kinetic energy into heat, and that heat has to go somewhere. On a long descent, if the rotor and pad combination cannot dissipate heat fast enough, you get brake fade: the pedal goes soft, stopping distances increase, and your confidence in the system disappears. Stock pads are typically made from non-asbestos organic or low-metallic compounds that prioritize quiet operation and low dust over heat resistance. They are not designed for repeated high-heat cycles under load.
Water crossings introduce a second failure mode. Submerging rotors and pads reduces friction temporarily, and applying hard braking immediately after immersion on a hot system can cause thermal stress on the rotor face. Off-road terrain also subjects brake components to vibration and debris at levels that accelerate wear on hardware engineered for smooth pavement.
The practical result: a stock brake system on a loaded overlanding rig can show fade symptoms on sustained descents even before the components are technically worn out. The problem is not a defect in the OEM system. It is a mismatch between a street-oriented brake package and the real demands of loaded off-road use.
Your Off-Road Brake Upgrade Options: Pads, Rotors, and Big Brake Kits
The brake upgrade path breaks into three tiers with meaningfully different costs, complexity levels, and performance returns.
Performance Brake Pads
A pad swap is the lowest-cost, highest-leverage improvement most overlanders can make. Stock organic compounds fade at relatively modest temperatures. Performance compounds maintain their friction coefficient at higher heat levels, which is precisely what you need on loaded descents.
The EBC Brakes DP61657 6000 Series Greenstuff Truck and SUV Brake Pad is a widely documented choice for this application. EBC formulates the Greenstuff compound specifically for trucks and SUVs. A pad swap alone, installed and bedded correctly, can be a meaningful upgrade on a loaded rig without touching any other component.
Upgraded Rotors
Upgraded rotors are the logical next step after pads. Stock rotors are plain-faced and sized conservatively for OEM compounds on stock vehicles. Slotted and dimpled rotors improve performance through two mechanisms: the grooves and holes provide escape channels for gas and debris that can accumulate between the pad and rotor face under heat, and they increase the rotor’s effective heat dissipation surface area.
The EBC Brakes GD818 3GD Series Dimpled and Slotted Sport Rotor combines dimpled and slotted features in a rotor designed to work alongside performance compounds like the Greenstuff pads. Pairing matched pads and rotors gives you a cohesive system rather than mixing a performance compound against a rotor calibrated for OEM use. The bedding process is also typically carried out on a matched set.
Big Brake Kits
For heavily built rigs - particularly three-quarter-ton and one-ton trucks running significant added weight - a full big brake kit replaces the calipers, rotors, pads, and related hardware with a purpose-built performance system. Larger rotor diameter increases the mechanical advantage of each braking input. Multi-piston calipers apply clamping force more evenly across the pad face, reducing fade and improving pedal modulation under load.
The Wilwood Front & Rear Big Brake Kit is compatible with 2013–2023 Ford F-250 and F-350 4WD trucks in single rear wheel configuration. The kit pairs 15-inch front rotors with TX6R red calipers and 15.5-inch slotted rear rotors, and includes brake lines and brake fluid. The larger rotor diameter and multi-piston calipers are designed to go beyond the stock braking setup. Note that rotors of this size typically require a wheel with adequate interior clearance — verify fitment against your specific wheel diameter and backspacing before ordering.
How to Choose the Right Brake Upgrade for Your Off-Road Build
Not every rig needs a big brake kit. The right choice depends on your platform, how you load it, and the terrain you actually run. Use this table to frame the decision before you spend.
| Upgrade Level | What It Includes | Approximate Cost | Best For |
|---|---|---|---|
| Pads only | Drop-in performance compound | $60-$150 | Stock or lightly modified half-ton, moderate loads, varied terrain |
| Pads + slotted/dimpled rotors | Matched compound and rotor | $200-$500 | Lifted builds, 200+ lb gear loads, regular mountain driving |
| Full big brake kit | New calipers, rotors, pads, lines | $900-$2,500+ | Heavy 3/4-ton and 1-ton trucks, regular towing, aggressive descents |
A few additional factors to weigh before committing to a tier:
Tire size. A 35-inch tire creates a longer lever arm working against your brakes than a stock 31-inch tire. Larger tires also add unsprung rotational mass that raises the kinetic energy your system must manage. If you’ve added a lift kit and larger tires to your truck, a rotor and pad upgrade is a natural companion modification - the suspension work and the brake work should happen in the same build phase.
Gross vehicle weight. If your rig regularly approaches its GVWR or is a heavy platform like an F-250 or F-350, the calculus shifts toward a big brake kit. Heavier vehicles carry more kinetic energy and stress brake systems harder through every stop cycle.
Wheel clearance. Upgraded rotors and big brake kit calipers need clearance inside your wheels. Measure before ordering, or consult manufacturer fitment charts. Many budget steel wheels will not clear larger calipers.
Brake line condition. Rubber brake hoses degrade with age and heat cycling. On a high-mileage rig, inspect the hoses whenever you are evaluating a brake upgrade. Stainless braided lines reduce expansion under pressure and noticeably improve pedal firmness. Many big brake kits include them as part of the package.
Regardless of which tier you choose, match your pads and rotors as a system rather than mixing a performance compound with a stock rotor that was not designed for the additional heat load.
How to Upgrade Your Brakes for Off-Road: A Step-by-Step Guide
Safety warning: Brake work directly controls your vehicle’s ability to stop. An installation error can result in brake failure and loss of vehicle control. If you are not comfortable with any step below, have the work performed by a qualified mechanic. Always support the vehicle on jack stands rated for your vehicle’s weight - never work under a vehicle supported only by a floor jack. Wear safety glasses and gloves. Dispose of used brake fluid as a hazardous material.
Most pad and rotor swaps on trucks and SUVs are within reach for a mechanically capable DIYer with basic hand tools. A full big brake kit installation is more demanding and requires careful attention to torque specifications, brake line routing, and system bleeding.
-
Gather your tools and materials. You’ll need a floor jack and rated stands, metric and SAE socket and wrench sets, a caliper piston tool or C-clamp, brake cleaner spray, fresh DOT 3 or DOT 4 brake fluid (check your owner’s manual for the correct spec), a turkey baster or syringe for the reservoir, a torque wrench, and a wire brush. Big brake kit installs additionally require a brake bleeder kit and possibly a line flare tool if the new lines are not pre-assembled.
-
Loosen lug nuts before jacking. Work one axle at a time, starting with the front. Remove the wheel after the vehicle is fully supported on stands.
-
Inspect the complete brake system before removing anything. Check the caliper for seepage, inspect the flexible brake hose for cracking or bulging, and assess rotor thickness against the minimum spec stamped on the rotor face or listed in your service manual. If the rotor is at or below minimum thickness, replacement is mandatory, not optional.
-
Remove the caliper and support it with wire. Never allow the caliper to hang from the brake hose - even brief hanging can damage the hose internally. Loop mechanic’s wire or a bungee cord through a nearby spring or frame member to support the caliper weight. Remove the caliper bracket if the rotor requires it for extraction.
-
Remove the old rotor. On most trucks, the rotor slides off the hub once the caliper and bracket are clear. If it’s seized from corrosion, a few deliberate strikes on the rotor’s back face with a rubber mallet will free it without damaging the hub.
-
Clean the hub face. Use brake cleaner and a wire brush to remove all rust scale and debris from the hub contact surface. Even a small raised area from contamination will cause rotor lateral runout, leading to vibration and accelerated wear.
-
Install the new rotor. Hand-tighten one lug nut to hold the rotor flat against the hub during caliper installation. Spray the new rotor face with brake cleaner to remove the anti-corrosion shipping coating before the rotor sees any heat.
-
Compress the caliper piston. Before retracting the piston, remove the master cylinder reservoir cap and draw out some fluid with the turkey baster - retracting the piston pushes fluid backward into the reservoir and can cause an overflow. Use the piston tool to push the piston fully into the bore. Install the new pads per the manufacturer’s orientation markings. Reinstall the bracket and caliper.
-
Torque all fasteners to specification. Caliper bracket bolts, slide pin bolts, and lug nuts all have specific torque values. Consult your service manual or the manufacturer’s documentation. Use a torque wrench - not an impact driver set to feel.
-
Pump the brake pedal before moving the vehicle. Sit in the driver’s seat and pump the pedal steadily until it firms up against resistance. The pistons were retracted during installation and are no longer contacting the pads. Until you pump them back out, you have virtually no braking ability. This step is non-negotiable before the vehicle moves.
-
Check fluid level and inspect for leaks. Top off the reservoir to the maximum line if needed. With the engine running, apply moderate brake pressure and inspect all four corners for seepage at banjo bolts, line fittings, and bleeder valves before driving.
Bedding In Your New Brakes
Bedding deposits an even, thin transfer layer of pad material onto the rotor face. It improves initial bite, reduces brake noise, and measurably extends the life of both components. Skipping this step - or rushing through it - leads to uneven material deposits, pedal judder, and inconsistent fade resistance from a system that cost you real money.
According to EBC Brakes’ published bedding procedure, the standard sequence for performance truck and SUV compounds runs as follows: Find a safe, empty stretch of road. Accelerate to 35 mph and apply moderate, steady braking pressure to decelerate to around 5 mph - do not bring the vehicle to a complete stop with the brakes engaged, as pad material can transfer unevenly onto the stationary rotor. Allow the vehicle to roll gently for 30 seconds to release heat before the next pass. Repeat 8 to 10 times. Then allow the brakes to cool completely - 15 to 20 minutes with no braking input at all. Repeat the sequence at 45 to 55 mph for another 8 to 10 gradual stops. Allow a full cool-down before hard use.
After bedding, the rotor face should appear uniformly gray with slight heat discoloration near the slots. Dark rings, blotchy patches, or glazed areas indicate uneven transfer - the cycle should be repeated before the system is subjected to demanding trail use.
For big brake kit installations, Wilwood Engineering’s bedding documentation recommends a more aggressive heat-cycling protocol suited to the larger thermal mass of their rotors. Follow the kit-specific instructions rather than a generic guide. The fundamentals are the same, but the target temperatures differ.
The difference in fade resistance and pedal consistency between a properly bedded system and an un-bedded one is noticeable under any real load. Don’t skip it.
Common Mistakes to Avoid When Upgrading Off-Road Brakes
These errors consistently appear in forum build threads and owner troubleshooting posts. Each one degrades the performance of an otherwise sound upgrade.
Not cleaning the hub face before rotor installation. Rust scale and debris between the hub and rotor create a high spot that causes lateral runout. Even minor runout generates vibration, uneven pad deposits, and judder that mimics warped rotors. Clean the hub surface thoroughly with a wire brush and brake cleaner before every rotor installation, including brand-new parts.
Reusing old brake hardware with new pads. Pad clips, anti-rattle shims, and retaining springs fatigue over time and lose their spring tension. Installing new pads against worn, corroded hardware allows pads to stick in the bracket, contact the rotor unevenly, and wear in an irregular pattern. Most quality pad kits include new hardware. Use it every time.
Skipping the bedding process. New rotors ship with an anti-corrosion coating and machining oils. New pads contain release agents from the manufacturing process. Neither is ready to perform at rated capacity out of the box. Failing to bed the system properly is the single most common cause of noisy, grabby, or inconsistently performing brakes immediately after an upgrade.
Under-torquing or over-torquing caliper bracket bolts. This is the mistake with the most serious potential consequences. Caliper brackets on trucks typically require 100 to 150 ft-lbs of torque, sometimes higher on heavy-duty platforms. An under-tightened bracket can shift under hard braking; an over-tightened one can crack or strip the threads. Both produce the same result: a caliper that moves when it shouldn’t. Use a calibrated torque wrench.
Mixing incompatible brake fluid types. DOT 3 and DOT 4 are miscible and chemically compatible. DOT 5 is silicone-based and is not compatible with DOT 3 or DOT 4 systems. Adding DOT 5 to a DOT 3/4 system can degrade seals and cause brake failure. Check your reservoir cap and owner’s manual before adding any fluid.
Braking hard immediately after a water crossing. Submerging hot rotors and then applying aggressive braking introduces rapid thermal stress and can promote uneven pad deposits. After any crossing, roll at low speed and apply gentle brake pressure for a few seconds to clear water from the rotor surface before loading the system.
Avoiding these mistakes costs nothing and protects every dollar you’ve spent on better hardware.
Frequently Asked Questions About Off-Road Brake Upgrades
Do I need a big brake kit, or will upgraded pads and rotors be enough?
For most overlanding builds on half-ton trucks running stock to moderately lifted configurations with typical camping loads, a matched pad and rotor upgrade is sufficient. Big brake kits deliver measurable gains in thermal capacity and pedal modulation, but they are most justified on three-quarter-ton and one-ton platforms, on vehicles that tow regularly, or on builds carrying substantial added weight from armor, storage systems, and overlanding gear. The cost-to-performance ratio of a pad and rotor swap is excellent for the majority of overlanders. A full big brake kit becomes the right call when your platform’s mass and terrain demands have genuinely exceeded what upgraded pads and rotors alone can reliably handle.
Can I install upgraded brakes myself, or should I use a shop?
A pad and rotor swap is within reach for most mechanically inclined truck owners comfortable with basic hand tools and torque specifications. The critical steps - properly supporting the caliper, compressing the piston without overfilling the reservoir, torquing bracket bolts to spec, and pumping the pedal before driving - are well-documented and not technically complex. A full big brake kit installation is more demanding, particularly any brake line work involved. If hydraulic line flaring or full system bleeding is outside your current skill set, shop installation is the safer call. Professional installation fees are genuinely trivial compared to the consequences of a brake failure on a remote descent with no cell service.
How often should I inspect brakes on a rig used for overlanding?
Performance pads typically last 25,000 to 50,000 miles under normal road use, but sustained off-road use, heavy loads, and repeated mountain descents accelerate wear significantly. A practical inspection interval is every 10,000 miles or before any major overland trip. Most pads include a wear indicator slot - when that slot disappears, replacement is due. Watch for warning signs between intervals: grinding sounds, a soft or long pedal, pulling to one side under braking, or visible scoring on the rotor face. High-performance compounds generally wear somewhat faster than OEM pads under repeated high-heat cycles, which is a reasonable tradeoff given their superior fade resistance when carrying a loaded rig.
Make the Upgrade Before the Trail Demands It
Brake upgrades fall into an uncomfortable category of modifications that overlanders tend to defer because the stock system technically still functions. That logic holds fine until you’re loaded, rolling downhill on loose shale, and the pedal starts going long. At that point, better pads are not going to help you.
The path forward is straightforward. Start with a matched pad and rotor upgrade if you’re running a stock or lightly modified half-ton. Step up to a full big brake kit if you’re on a heavy-duty platform with real weight and real mountain grades on your route list. Bed the system properly, inspect it before every major trip, and treat it as the most consequential safety system on your rig - because it is.
Pick the tier that fits your build and your budget. Make the change before the trail forces the decision for you.
If this guide was useful, bookmark it or share it with someone who’s about to head into the hills on stock brakes.
Related Reading: